

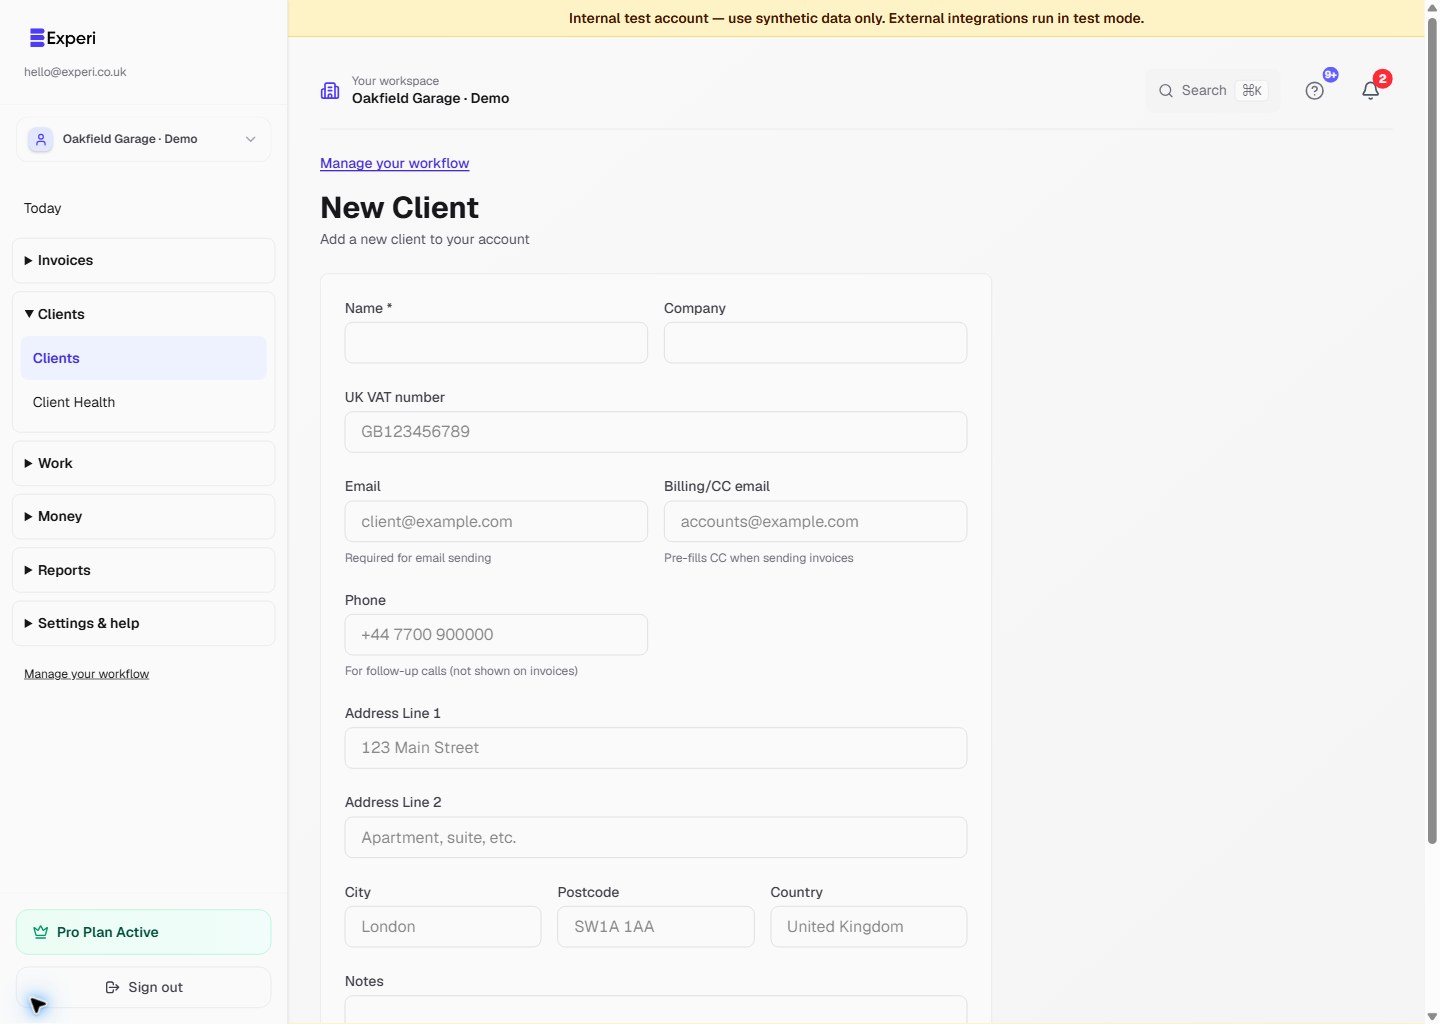
Check the workspace name, then open Clients → New Client.
Complete the form
- Enter the client’s Name.
- Add a company name if relevant.
- Enter the Email needed for document delivery.
- Add a Billing/CC email only when that recipient should be included; it pre-fills invoice CC.
- Add optional phone, address, UK VAT number and useful notes as appropriate.
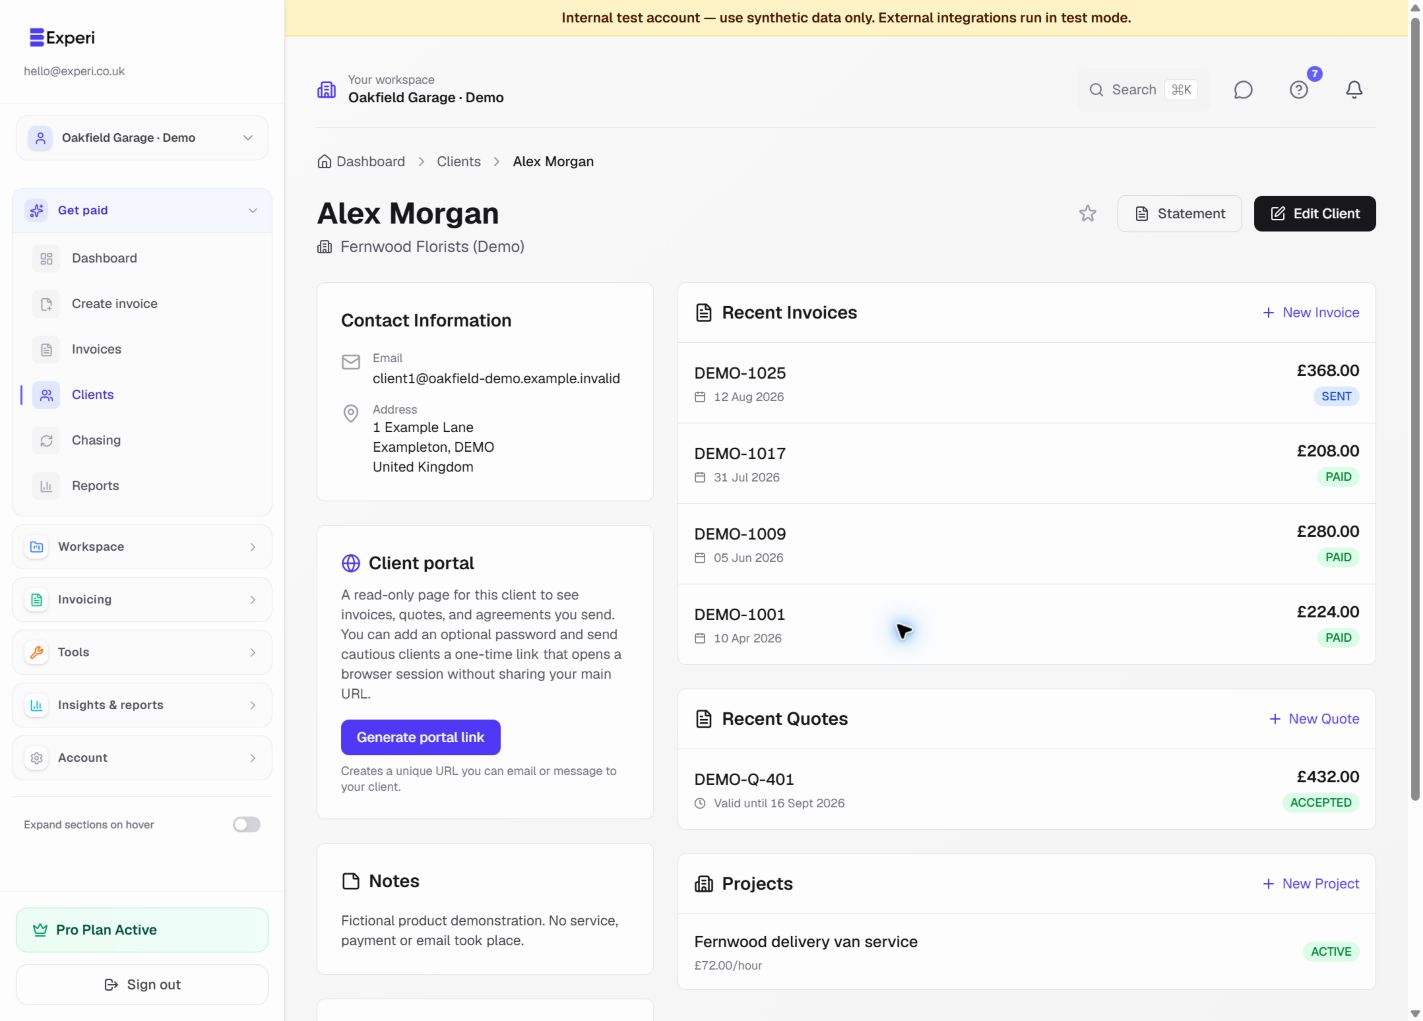
- Choose Save client, then review the resulting record.
Use the client's real billing address and double-check the intended recipients before sending any documents.
Use the record
Select the saved client when creating an invoice, quote or project. Review the recipient every time; saving a contact does not send a document.
The client overview shows related work and portal controls. A portal link is private access and should be generated and shared deliberately, not published in a help screenshot.
Use Edit Client to update details. The current client UI does not include a reversible archive workflow; see managing inactive clients before considering deletion.