

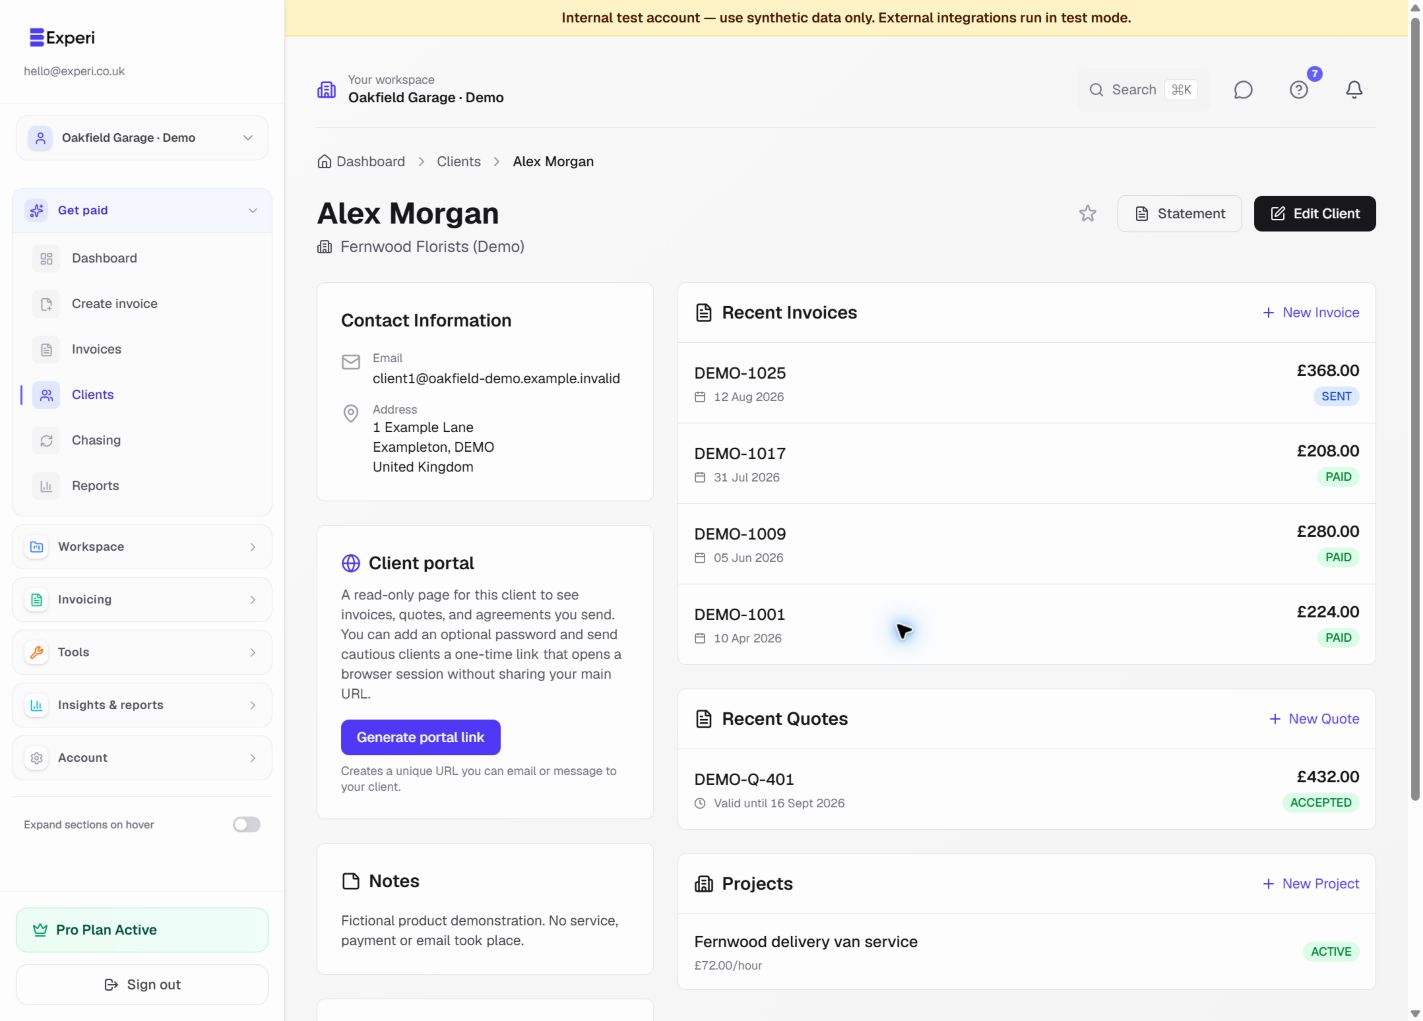
Start with one accurate client record. Its invoices, quotes and projects are easier to review when the name, company, billing email and address are consistent.
Review the client
- Open Clients and search for an existing record before adding another.
- Review the billing contact and address. Avoid replacing a real customer with a test address in a live workspace.
- Open the client's invoices and payment history to answer account queries.
- Use Client Health, where available, to review patterns in your own recorded payments. It is not an external credit check.
Manage portal access
The client detail page contains portal controls where your plan and permissions allow them. Generate or copy the client-specific link only when you intend to grant access, and share it through an appropriate private channel.
Treat the link as private access information. Do not place it in public screenshots or help requests. Use Revoke link when access should end, then review the state shown by the app before sharing a replacement.
Prepare an agreement
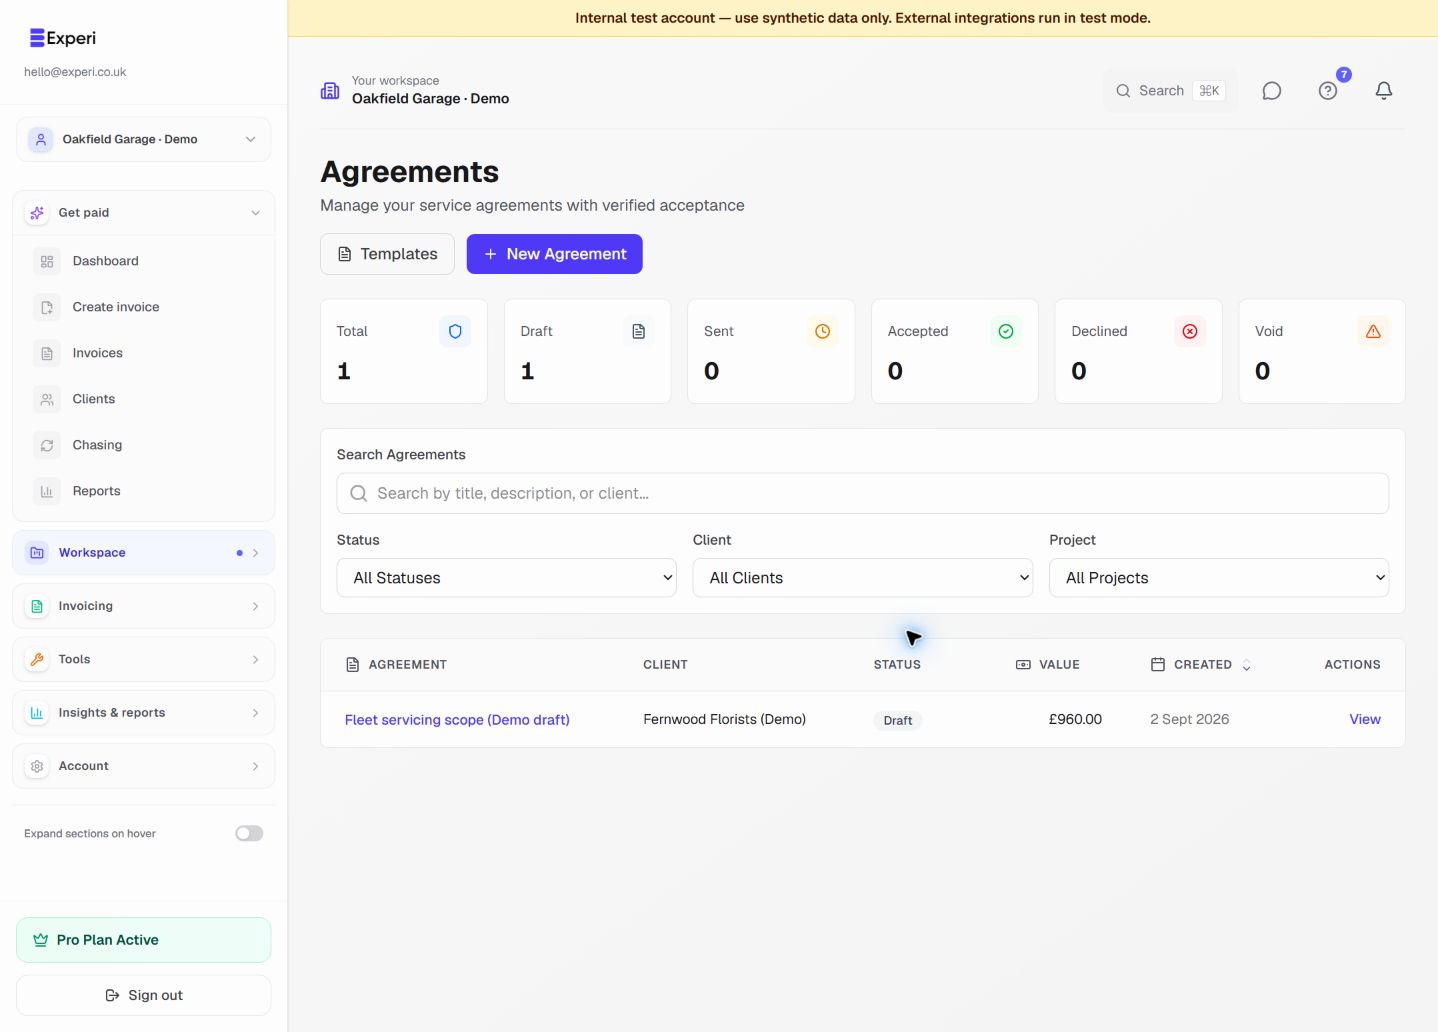
Open Agreements and create a draft, or use an agreement template. Select the client and project, describe the scope, and review value, dates, terms and any milestones before sending an acceptance request.
The list separates draft, sent, accepted, declined and void documents. Inspect the individual record and its audit history rather than treating a drafted document as accepted.
An agreement is not an invoice or payment receipt. Acceptance does not itself charge a customer. Templates are reusable starting points, not legal advice; review terms for the actual engagement.
See quotes, project tracking and team access.